Wednesday 28 September 2011

Baked Chai Cheesecake

From the top.
This is the cake that my boyfriend requests the most. It's really simple, rich and creamy, yet light at the same time. It's baked, so it doesn't have a wobbly gelatine mousse like texture to it. The general recipe is always a winner so you could alter the flavours when the mood takes you- lemon, vanilla...I think that a sharp, zingy one would work well. I really like the chai flavours, sweetly spiced with hints of cinnamon, ginger and cardamom. I use a chai masala mix that I got in India, but you can use any kind-or if you have chai teabags, just stew a few in the milk for 20 minutes. The amount of eggs and cream cheese in the recipe means it's more of a New York style bake, which is why you get the slightly higher crust. It takes a while to cook- 4 hours in total, but most of this is just leaving the oven door open. It can be made 24 hours in advance, great for when you have a few friends over!


Ingredients:
375g digestives (or gingernuts)
175g melted butter
500g cream cheese
200g caster sugar
4 eggs
75ml milk
1 tablespoon masala tea
1 star anise
2 cardamom pods
1 cinnamon stick
1 tsp ground cinnamon
1 tsp ground ginger
1 clove
1 breakfast teabag
300ml double cream
2 tablespoons plain flour
1 1/2 tsp vanilla
zest of a lime and the juice of 1/2


Method:
- grease a 20cm spring form, high sided tin and heat the oven to gas mark 4
- blitz the biscuits in a food processor until fine. Add the melted butter and process for 15 seconds. Tip in to the tin and flatten. Make sure it's well packed or it will crumble apart later. Put in the fridge for an hour.
uber strong chai
- meanwhile, heat the milk in a small saucepan. Add the chai, the teabag and all the spices (not the vanilla or the lime). Bring to the boil then allow to stew while the base firms up. Strain and add to the cream.
- whisk together the cheese and the sugar. Add the eggs and the cream and whisk until well combined. Bash (with care) the bowl on to the side to remove any big bubbles.
- fold in the flour, vanilla, zest and juice. Pour in to the tin and bake for 1 hour. It should rise quite a bit and go brown on the surface. There should also be a slight wobble in the middle. If it's cracked, the oven may be too high. After the hour's up and it looks about done, turn off the oven and leave it in there fro 2 hours. Then open the door and leave it be for another hour. Goodness! THEN refrigerate overnight- or till it's cold if you want it now. 

it went down a treat!

Monday 26 September 2011

Lemon Courgette Cake

Lovely moist courgette lemon drizzle
A lovely, moist summery lemon drizzle courgette cake with zingy cream cheese icing. The courgette ensures the cake doesn't dry out and gives it a really good texture. I tried to make this last year and followed the recipe exactly- I was a little dubious about the method, and rightly so! It said to cream the butter with the sugar at the same time as adding the courgette and the lemon juice, which stopped it from blending together properly resulting in lumpy greasy bits of butter in the finished product. The cake tasted nice but it was greasy as. So this time I used the ingredients and made the cake as I saw fit. It went marvellously! (even though the oven was turned off by accident). Delicious. NOTE! If the butter for the icing can't be scooped and measured with a spoon, it is too cold and will not blend well. 


Ingredients:
250g very soft butter, 2 tsp scooped out and set aside
200g caster sugar
3 lemons
3 eggs
3 courgettes, grated (around 300g)
1tsp poppy seeds + more to decorate
1tsp vanilla
100g self raising flour + 100g wholemeal plain (or just SR)
1tsp baking powder
85g icing sugar
200g cream cheese 


Method:
Heat the oven to gas mark 4 and grease and line 2 20cm round tins
- zest and juice 2 of the lemons. Set aside
- cream together the butter (less the 2tsp) and sugar. 
-Add in the eggs and whisk together. If it starts to look a little curdled, add in a tablespoon of the flours. 
-Add in 2 tablespoons of juice, the vanilla, the seeds and the courgettes and mix well. Then add the flours and baking powder with 1/4 tsp salt.
- spoon in to the tins and bake for around 25 mins. They should be slightly browned and springy to the touch.
- cool for 15 mins in the tine then turn on to a wire rack.
- make a drizzle: mix 1 tablespoon of juice with 25g of the icing sugar. Poke holes in the cakes and drizzle over.
-make the icing: beat the 2tsp of butter with the cream cheese NOTE! they should be the same temp for them to blend together. Then add in the rest of the icing sugar. Add the zest of the 3rd lemon and 2 tablespoons of juice, or to taste.
- when cold, place one half of the cake on a plate, ice with half the icing, add the other cake and top with the rest of the icing. Add on some more poppy seeds.
ta da! nice with a cup of tea
Keeps well for a few days. Nom Nom.

Thursday 22 September 2011

Profiteroles with Creme Patisserie and Chocolate Fondant

Nom nom nom.

My Monday night baking class this week involved the production of some seriously delicious choux pastry treats. I made quite a few light and crisp profiteroles and some very large eclairs - still crisp and airy, but not unlike a slipper in their appearance ( no worry, more room for filling). I dipped the tops in to some melted fondant icing with chocolate and made some creme patisserie to fill them, which is basically a version of this custard thickened with cornflour and flour. I then folded in some whipped cream to make it a little lighter, piped it in and, voila! Tasty mouth sized desserts.


For the Pate a Choux
Ingredients:
250ml water
pinch of sugar and salt
100g butter
125g strong (not plain) flour
4 eggs, lightly beaten


- Heat the oven to gas mark 7 and lightly grease two baking sheets
- Place the water, butter salt and sugar in to a saucepan and heat on high. Do not stir. Hopefully the butter will have melted as the water starts to boil. When it boils, water will evaporate leaving you with less that you measured out = a potentially dry mixture before you've even started. Once the butter is melted and the water boiled, take off the heat.
- Add the flour in one go and mix with a wooden spoon until the paste leaves the side of the pan in a ball. Leave to cool.
mix until it comes away from the side
- Once cool add half the eggs in small amounts, beating in to the mixture after each addition. Only add half because you shouldn't have to use all of the eggs. Once half are in, assess the situation. The paste should be smooth. Use the handle of an eating spoon to test if its ready- when drawn through at a steady speed the channel created should start to collapse in then stop before it fills in.
- Keep adding egg until this happens. You should have a little left over- it should take about 3 1/2 eggs 
- once at the right consistency, fill a piping bag and pipe out on to the prepared trays. About the size of an amaretti biscuit. Dampen down the little peaks with a wet finger. Bake at gas mark 7 for 10 minutes then turn the heat to 5 for 20-25 mins. DO NOT OPEN THE DOOR! They could collapse- and what a shame that would be. 
Once cooked, leave on a wire rack after poking little holes in the bottom. When cold, fill with delicious filling.


Delicious filling
150ml milk
100ml double cream
20g plain flour
10g cornflour
3 egg yolks
40g caster sugar
100ml double cream extra
tsp vanilla
- heat the milk, cream and half the sugar until slightly frothy. Take off the heat and allow to cool. 
- whisk the eggs with the rest of the sugar till pale. Add in the flours and whisk. 
- Pour 1/3 of the milk on to the eggs and whisk, then add back in to the milk. Heat over a low heat stirring constantly. It will eventually go quite lumpy and look a bit like mayonnaise. 
- take off the heat and whisk till smooth.
- whip up the rest of the extra cream and then fold in to the mix with the vanilla. Pipe in to the profiteroles! Dip in to melted chocolate/chocolate fondant.
the ones with orange blossom creme patisserie and a chocolate sauce


I made these again last night for when my friends came round for tea. I used orange blossom water and zest to flavour the filling- extra delicious!


Sunday 18 September 2011

Hazelnut and Dark Chocolate Meringues

Strawberries, nutty meringue and chocolate. Hello.
Due to my week of cakes with accompanying custards, I had a few more egg whites to use up. A friend who I hadn't seen for ages was coming over for dinner and I only had a snippet of time to get things ready after work - so, meringue it was! I always have a few things in the cupboard; some baking essentials, dark chocolate and some form of nut. The only sensible conclusion was a crisp, chewy on the inside nutella inspired chocolate hazelnutty tastiness. 
I always measure in imperial for a meringue - 2oz of sugar for each white


Ingredients:
3 egg whites
6 oz caster sugar
a tablespoon of cornflour
tsp white wine vinegar
50 g dark chocolate, chopped
a good handful of hazelnuts, chopped (I dry roasted mine in a pan for a bit first as they weren't roasted). 

-Heat the oven to gas 1/2 /- 100C. Have ready 2 baking sheets lined with greaseproof.
- using an electric whisk, whisk the whites until they form soft peaks
-Add half of the sugar and whisk on high- it will go super shiny and smooth.
- Add the rest of the sugar along with the cornflour and vinegar. Continue whisking for a minute or so until very stiff and shiny. Super luxurious marshmallowy deliciousness.
- Gently fold in the nuts and chocolate with a large metal spoon. 
- distribute in to pillowy piles on the sheets and bake for around an hour.

I served mine with a few tiny strawberries and a whisper of cream.


Jam jam jam jam- JAM!

Jammin'- we're jammin', hope you like jammin' too
This week I inexplicably made 3 different types of jam on three different occasions. Well, not inexplicably- I really like jam. It started because I wanted some blackberry jam and could only find one type, and well- it just wasn't as tasty as I wanted it to be. So I made some. Then there were some strawberries going cheap at the shops...then there were some damsons. I've never had damson jam before (but now I have tried an actual damson- my face turned inside out- it was very tart!), and now I have some.
I tend to only make enough jam each time for around 2-3 450g jars: this is because I don't have a pick your own, or a strawberry patch or even anywhere near by for a good forage. 
If you want to make some jam, remember to sterilize the jars first. Last year I got overly excited by a crate of raspberries and failed to do this. I also used a Branston pickle jar for one of the jars. This = mouldy jam with a vinegar tang. Sterilize the jars by washing in hot soapy water, rinsing and then drying in an oven set at gas mark 3 for 10 mins. 


The blackberry and the damson went very well- they got a really good set- but the strawberry one is quite soupy. Still delicious! But soupy nonetheless. I got my jam making kit for christmas last year. It makes me happy when I get to use it.


For the blackberry and strawberry jams I used equal parts fruit (around 500g) to granulated sugar and no water. I added the juice and zest of a lime and an apple to the strawberry for flavour and pectin respectively, and the juice of a lemon to the blackberry. 

 Place the fruit (including the juice for both and the apple and zest for strawberry) in a large pan and heat gently, until the juices start to come out. Then add the sugar, heat gently and stir carefully to dissolve. Bring to the boil and heat to 110C (test using a thermometer). 


Boil for 10 mins at this temp, then test for a set using a cold saucer: if a drop of jam wrinkles when pushed, it's ready. If not, keep boiling and teat every minute. 
Allow to cool slightly then pour in to the hot jars. Leave to go cold. 


Damson Jam! A little different to the others. This recipe is from the WI Book of Preserves by Carol Tennant. It's a great book- there's loads of stuff in there. I halved the recipe so for ease I used pounds and ounces.
1lb 6oz damsons
9 fl oz water
1lb 11oz granulated sugar


-wash the damsons and remove the stalks. Put in a large heavy bottomed pan with the water and cook gently for around 30mins. They should start to break down.
-Add the sugar and stir to dissolve. Turn the heat up and boil for 10 minutes, reaching 110C. Test for a set (using a cold saucer and wrinkle test). If it isn't ready, keep trying at 1 minute intervals.
- Remove the stones as they rise to the surface ( it is unlikely that you'll be able to get them all, I certainly didn't). 
- Remove from the heat and skim off the scum. Leave to cool slightly and then bottle in sterilised jars.


TASTY!

Friday 16 September 2011

Mississippi Mud Cake

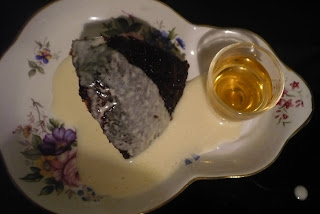
I knew you were coming so I baked a rum cake with rum custard and rum

After winning a few bottles of rum at the pub quiz, I decided it
 would only be fair to the team if we had spent a night having a tipple. So I bought some cola, a few limes and a couple of packets of crisps, and of course, baked a cake with a rum twist ( well, come on- you can't invite your friends around and not offer them some cake!). I've made this cake a few times before, and it turned out rather differently this time- and I'm not too sure why. It's usually more...cakey- very dense but with more of an obvious crumb. Maybe there was a little too much liquid. Who knows. It was tasty in any case- very moist, dense and chocolatey with hints of rum and coffee coming through. I made a some rum custard to go with it, which started to scramble but some swift cooling and whisking sorted that right out. The custard tasted like melted ice cream with- RUM! Oodles of the stuff.
Yo ho ho!


Ingredients: 

225g plain flour
1/4 tsp salt
1 tsp baking powder
300ml strong brewed coffee
50ml rum (or brandy or bourbon)
150g plain chocolate (doesn't have to be super dark, I use 52%)
225g butter
400g caster sugar
2 eggs at room temp
1 1/2 tsp vanilla extract


Method:
- preheat the oven to 140C/gas mark 1. Grease and cocoa powder (tipping pout excess) a 3 pint bundt/ring tin. (I forgot to dust mine! Maybe that's why it was different?)
- sift the dry ingredients together and set aside
-melt together the chocolate, butter, coffee and booze in a heat proof bowl over a pan of simmering water. Stir occasionally. Pour this in to a large bowl and whisk on a low speed. Have a tea towel or such like to hand to cover as it can get a bit splashy.
- gradually beat in the sugar until dissolved.
-increase the speed to medium and add the dry ingredients. Mix well, then beat in the eggs and vanilla till smooth.


mmm...silky smooth
- pour the batter in to the tin (it will be very runny) and bake for an hour and twenty minutes. Use a sharp knife or a skewer to check if its done- if it comes out with raw cake on, stick it back in for 10 minutes and try again.
-allow to cool in the tin for 15 before turning out on to a wire rack to cool completely. Serve with whatever you fancy- cream, ice cream- or rum and rum custard a la moi! 


To see how to make the custard, go here. Once the custard is at the final stage of whisking and cooling, add a splash or two of booze. NOTE! if you want to flavour it with a drop of something, do not use a vanilla pod as it will just be wasted. That would be a shame.


Recipe adapted from Martha Day Baking, Lorenz Books

Macaroons mark deux


So! My first attempt turned out quite well- they didn't look quite right, had a lack of 'feet', weren't overly shiny or smooth, but they tasted good.


Like many others out there, I have decided that I would like to be able to bake at least a passable macaron. Ground almonds are one of my favourite ingredients as I love the texture and almond is one of my favourite flavours. Nom.


So, after Monday night's marmalade pudding and custard I had some egg whites to use up. After work on the Tuesday I had an hour or so before the pub quiz and decided that would leave me ample time to mix the paste, make the Italian meringue, pipe and have some dinner. HA! Well, I did it- a few were a little larger and more messy than the others, but really I just wanted to practice texture, consistency and baking. Back from the pub at 12 having done terribly at the quiz, I got them in the oven. Here they are.


As you can see, better than the first go, but still not quite smooth enough. Also, I used the main and top oven, causing the top oven to be notably hotter which discoloured that batch, but they still tasted the same.


Ingredients:
170g icing sugar
160g ground almonds
120ml egg whites from about 4 medium eggs, separated in to two equal batches
160g granulated sugar
drop of food colouring - I used red
Method:
-blitz the almonds and icing sugar together until fine. Sift in to a large bowl (you will need to mix everything in this bowl eventually). Add one lot of whites to this and mix to make the paste. Set aside
- Get the other egg whites ready in a heat proof bowl with an electric whisk to hand. Place the granulated sugar and and 50ml of water in to a small saucepan. Heat until dissolved then boil until the syrup reaches 110C. Beat the eggs on high to form stiff peaks. When the syrup gets to 118C carefully and slowly pour it in to the eggs. Continue to whisk on hight. They will go thick and shiny. Continue until the meringue is cool. Add the colour and mix.
- add the meringue to the paste and fold together. It should be thick and smooth- if you over mix it it will spread and not rise.
- heat the over to gas 3/150C. Line 3 pans with baking paper. Pipe the mixture in to small circles 2.5cm in diameter. Smack them hard on the counter to dislodge air bubbles and leave to rest out of the fridge for 30 minutes. This supposedly helps to form a skin and improve shine.
-Bake for 15 minutes. Slide the paper on ta cool work surface for a few minutes before peeling them off the paper. If the shell comes off and they stick, they are underdone. Return to the oven for a few more mins and try again.
- Leave to cool then fill with jam or butter cream or ganache or whatever. I used raspberry jam on some and nutella on others.


I found that all of my macarons were under baked after 15 minutes, and still after a few more. The batch that turned out the best were the ones that I decided to leave in the oven overnight after I had turned it off. These ones had a flat and attached underside, perfect for piping the filling. This leads me to wonder if baking them should involve a combination f a high heat to aid rising, and then a low heat to dry them out- like a traditional meringue. I shall toy with this theory next time.


Recipe from June 2011 Good Food magazine

Wednesday 14 September 2011

Marmalade Pudding with Vanilla Custard

Marmalade steamed pudding

I have recently started an evening patisserie class on a Monday night. The first recipe was for Hot Marmalade Pudding with custard- an easy one to get us started. At first I was sceptical about the idea of a marmalade pudding, not being the biggest fan of the stuff myself (although I couldn't resist making a batch of Seville Orange Marmalade back in January). However, with one mouthful I was converted and awakened to the delights of the orange stuff. It's sticky, warming, rich and light at the same time with a lovely orangy tang coming through from the marmalade. I was initially pleased by the amount of marmalade in the ingredients as it would help to finally diminish the homemade stash in the cupboard- now I wish I had more to make it again... shop bought will have to do. I would happily substitute a christmas pudding for this- especially if laced with a bit of booze. 

Ingredients:
Enough brown bread to make 150g of breadcrumbs
120g dark, soft brown sugar
25g self raising flour
120g butter plus a little more for greasing
2 eggs
about 8 tablespoons of coarse cut marmalade
1 heaped tsp bicarbonate of soda


Method:
- butter a 3 pint (preferably plastic) pudding basin well 
- remove most of the crusts from the bread and whizz in a food processor until you have fine crumbs. Place in a large bowl.
- melt the butter over a gentle heat. Once melted, add the marmalade and stir until incorporated. Cool slightly.
- add the melted ingredients to the breadcrumbs and mix, then mix in the sugar.
- Beat the eggs, then add to the marmalady bread. 
- finally, sift the flour and bicarbonate of soda in to the wet mixture and stir together well. 
- Pour this in to the basin- there should be a few inches of space left to the rim.


-Scrunch up a square of greaseproof paper, flatten and butter one side. Make a pleat in the centre and secure on to the top of the basin with a long piece of string, tied around the rim. Make a pleat in a large piece of foil and scrunch around.
- Place the basin in a large pan of boiling water, so it reaches half way up the side. Simmer for 2 hours with a lid on, topping up the water as necessary.


Custard!


Ingredients:


275ml milk
275ml double cream
6 egg yolks
100g caster sugar
vanilla pod/ a few drops of vanilla extract


Method:
-warm the milk and cream together until frothy. Add about half the sugar and stir gently. Set aside to cool.
- whisk the yolks with the remaining sugar until pale and increased n size.
- pour 1/3 of the cooled milk mixture in to the eggs and whisk (this gets the eggs used to the heat). Then add this back into the rest of the milk mixture. Return to a very gentle heat. Add the pod (slit open, seeds scraped out etc) or the extract at this stage.
-using a wooden spoon, stir the custard in a side to side fashion, ensuring no bits get the chance to burn.
- it should take a while- don't be tempted to turn the heat up. The custard is ready when it coats the back of a spoon and a channel is left when a finger draws a line through it.
- Pour (do not scrape the bottom out) the custard in to a clean, cool bowl and whisk until cool. 
TA DA!


The custard turned out pretty well even though I let the milk and cream boil over, and the fact that mine took the longest to make (I was quite sure I was going to end up with sweetened vanilla milk). Persistence is key! Delicious with the pudding and a drop of rum.


NOTE! I had another go at making some custard- of course, this time I heated the egg + dairy mixture too quickly, scrambling the eggs. To prevent complete disaster, I quickly poured it in to a cold bowl and whisked it to within an inch of it's life! And, voila! custard back from the depths of despair- it's just a bit thinner.


Although this was made in a cookery class, I believe it has been adapted from a Nick Nairn recipe.

Monday 12 September 2011

Moroccan Semolina Pancakes with Blueberries and warm Honey


These semolina pancakes are one of my favourite things to make for breakfast on a lazy day off. Although they look like a crumpet or a pikelet, they taste completely different and are delicious served with butter and warm honey drizzled over the top. Yeast is the raising agent so they take a little longer to make than a pancake made with baking powder, but the extra time is worth it.


This time I made a quick blueberry sauce with lime juice and a little sugar to counteract the sweetness of the honey. 


This recipe will make 16 good sized pancakes. I usually serve 2-3 per person.


For the pancakes:


4tsp active dried yeast
125ml lukewarm water + 375ml lukewarm water
250g plain flour
250g fine semolina
1/2 tsp fine salt
2 medium eggs
125ml lukewarm milk


oil for coating the frying pan
butter, to serve
warmed set honey, to serve.


For the Blueberries:
225g of blueberries
juice and zest of 1/2 a lime
1 tsp granulated sugar.


Method:
-Dissolve the yeast in the 125ml of lukewarm water and mix in 3 tsp of the plain flour. Cover with a cloth and leave in a warm place for around 15 minutes until frothy.
- Sift the rest of the flour, the semolina and the salt in to a large, warm bowl. Make a deep well in the centre. Lightly beat the eggs in to the warm milk and pour in to the well, then add the frothy yeast mixture and the 375ml lukewarm water. 
- Using a balloon whisk, gradually incorporate the dry ingredients in to the wet. Whisk for 5 minutes until smooth. It should be quite thick.
- Cover the bowl with a clean towel and leave in a warm place for an hour until doubled in size and bubbly.


-Meanwhile, place the sauce ingredients in a pan and cook gently. add a little more sugar if desired. Keep warm or reheat when needed.


- Heat a frying pan on high then turn the heat to medium. Add a little oil then wipe away the excess with kitchen roll. Ladle in a small amount of the batter (just smaller than a saucer). 
- Cook until small holes appear in the top and the pancake looks dry- around 3 minutes per cake. 


Serve with lashings of butter, warm honey, the blueberries and a nice cup of tea. 


If you can't manage them all, they keep well in the fridge for 2 days layered between greaseproof paper.


Recipe adapted from Tess Malos. The food of Morocco, a journey for food lovers. Murdoch Books, 2008.

Sunday 11 September 2011

A Tea Party for Breast Cancer Care

The Works
Chocolate and Peppermint Cupcakes
On the 25th of August I held a tea party to raise money for Breast Cancer Care, which gives advice and support to the 49,000 people diagnosed with breast cancer every year. Thanks to my lovely friends, I was able to donate £121.60 to a great cause. I baked all day and was able to offer: chocolate cupcakes with peppermint buttercream icing, mini eclairs, fruit scones, vanilla cupcakes with a cheesecake topping, macaroons, orange polenta cake with an orange and cardamom syrup, a berry and cream Genoese sponge, brownies, a banana loaf and a stilton and broccoli quiche!   P H E W! It was quite an extravaganza with lashings of tea and a few bottles du vin. 

Everything went pretty well considering some of the things were a first attempt. I shall definitely be making some more macaroons in the very near futurethey weren't nearly shiny or smooth enough! 
Macaroons and Brownies

Considering how much food there was, there weren't that many leftovers. Thank you to all who came, and also to the few who didn't make it but donated generously.