Sunday 11 December 2011

Banana Bread


I left work the other day armed with a dozen over ripe bananas as we were going to be closed for the weekend and "they would be walking out on their own" by Monday. So, what should I do with these blackened over-banana-smelling fruits? BANANA BREAD!


This recipe can be easily halved (just use four bananas, not 3 and a half)- just I had lots of them.


Ingredients:
200g white bread flour
200g wholemeal bread flour
4 tsp baking powder
3/4 tsp salt
1/2 tsp cinnamon
150g butter
200g caster sugar
30g soft dark brown sugar
zest of 1 lemon
7 ripe bananas, mashed
2 eggs


Method:
-Set the oven to gas 5/200C. Line 2 loaf tins/ 1 loaf tin and a tray of mini loaves.
-sift the flours, baking powder, salt and cinnamon in to a large bowl.
-cream the butter, zest and sugars together.
-mash the banana with a fork then mix in the eggs. Mix the banana-egg concoction in to the sugar ingredients and mix well. Pour this in to the dry ingredients and combine quickly and thoroughly.
- portion out in to the tins
-Place on the top shelf/top and middle and immediately turn the oven to 4/180C. Bake for 50 mins checking after 40. Test with a knife. It may need a further 10 mins. 


Tea, please!

Saturday 10 December 2011

Stollen

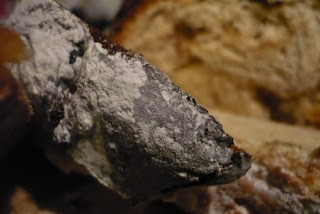
Mmm...christmassy and almondy
I decided I wanted to make something Chritmassy that would fill the flat with the smells and warmth of the yule tide. Seeing as I can barely resist anything with almonds, stollen won.
I've wanted to make this for a while as the recipe has been hanging around in the back of one of my favourite baking books (Baking Martha Day). I altered the recipe ever so slightly from the original- a few more fruits and spices here, a little more rum there. It went pretty well- tasted lovely! But caught in the oven at the last moment- I shall check on it 5 minutes earlier next time (I was preoccupied with a mug of mulled wine...).
This makes 1 loaf. It's a long list but it's worth it.


Ingredients:
150g sultanas
4 tblsp dark rum
375 bread flour (white)
1/2 tsp salt
50g caster sugar
1/2 tsp ground cardamom (about 6 green pods, bashed and outer bit discarded)
1 tsp cinnamon 
2 7g sachets of fast action yeast
129ml lukewarm milk
50g melted butter
1 m egg, lightly beaten
70g candied peel 
50g blanched almonds, chopped
melted butter for brushing
icing sugar for dusting


FOR THE ALMONDY FILLING
115g almonds, ground
50g caster sugar
50g icing sugar
1/2 tsp lemon juice
about 1/2 an egg, beaten
drop of almond extract


Method:
-Turn the oven on to gas 4/180C. Put the sultanas in to heat proof bowl and place in the hot oven for 5 mins. Pour over the rum and set aside. Sift the flour, salt, sugar and spices in to a large bowl.
-mix the milk and yeast together. Pour in to the flour. Mix a little of the flour from around the edge of the puddle to form a thick batter. Sprinkle a little more of the flour over the top. Cover with some oiled cling film and leave in a warm place for 30 mins to sponge.
-Add the melted butter and egg and mix to a soft dough. Knead on a floured worktop until smooth and elastic- 10 mins should do it. Oil the bowl, put the dough back in and cover with the cling film again- and leave to rise in a warm place for 2-3 hours.
- meanwhile! mix the almonds, extract, caster sugar, icing sugar, lemon juice and enough egg to make a paste. Wrap it up in cling film like a sausage and set aside.
- Knock back the dough, pat out in to a rectangle about 1" thick and sprinkle over the rummy fruits, candied peel and almonds. Knead and fold gently to mix in the fruit and nuts.
- Roll the dough in to an oval, with the centre slightly thinner than the edges. Place the almond sausage in the centre, adjusting to fit. Fold the dough over the paste so that it encloses it but does not reach over to the other edge (i.e not like a pasty). Press down to seal and twist the ends a bit. 
-Place the dough on to an oiled baking sheet. Cover with film and LEAVE TO RISE AGAIN! for about an hour, until doubled in size. 
-NOW! preheat the oven to gas 6/200C.Bake for 30 minutes -CHECK AFTER 25! It should sound hollow when tapped on the bottom. Brush the top with melted butter and dust with icing sugar.


Delicious for breakfast!

Thursday 8 December 2011

Christmas Tree Biscuit Decorations

Finally got to use my pretty baubles
It's nearly Christmas! Hooray! I wanted to have a full day of Christmas baking- but alas! I ran out of time and only managed these tree decs and some macarons. Another day. These biscuits are from the December 2011 issue of Good Food (with a tiny flavour addition) and are really easy. I chose them for their sturdiness. Hopefully they will still be good for munching on over the coming days.


This list made 16 and there's still half of the mixture in the freezer.
Ingredients:
225g butter, soft
225g caster sugar
1 egg, beaten
1/2 tsp vanilla extract
zezt of a lemon
freshly grated cinnamon
450g strong white flour (or plain)
silver balls, edible glitter, water icing (quite thick), wool


Method:
- cream together the butter and sugar and add the egg, flavours and a pinch of salt and mix.
-Add the flour gradually and mix until smooth. You may need to do this in a kneading action rather than a stirring one.
-tip out on to the work surface and shape in to a ball and fridge for half an hour.
-preheat the oven to gas 4/ 180C and line a few baking sheets. Roll the dough to 1/2 cm thick and stamp out with some cutters. Make a hole in the tops with a chopstick, or whatever, and bake for 12 minutes. Leave to cool, decorate, string up and hang on the tree!


Lemon and Chocolate macarons

The lemon one's right at the back!

So! It was my boyfriend's birthday this week and I made him an array of food for the occasion. We had blueberry pancakes for breakfast, lavender and honey pannacotta and blackberries for dessert and a coconut Genoese with lime French butter cream for the birthday cake (among some savoury eats, too!). I made Hugh F-W's sponge and substituted half the flour with whizzed up dessicated coconut, and brushed the cakes with coconut syrup. I made the French butter cream from this post, here, but used lime instead of lemon. It was pretty tasty! It didn't have quite as good a rise as a normal un-coconutty one, but it was slightly chewy and fragrant. This adventure landed me with some leftover egg whites. And leftover cream from the pannacotta...so ganache filled macaron attempt 3 it was!


I used the same recipe and method as my previous post (this one)but split the mixture in two. I flavoured one half with lemon zest and coloured it yellow, whilst the other was spiked with 40g of cocoa powder. Next time I would prefer to go really chocolatey by adding in melted chocolate and taking a little more time over the whole process. 
This time I didn't bother to leave them out for any specific length of time, aside from the ones that were waiting to get baked- and I don't think it made that much of a difference, if any.
I tried to make slightly smaller ones this time, which was a disaster on two accounts: 1, they didn't come out as smooth and uniforms as my last attempt and 2, I ate more.
They are filled with a ganache made by boiling cream and whisking in an equal amount of dark chocolate.
See! There's the lemon one!


ALSO! NB!!!! Handy hint to help next time: Only use the top shelf of the oven and bake one tray at a time. The first batch I did, I put two in at once. The middle shelf ones didn't cook properly, hence the lack of lemony goods (I also ate a lot of them). 

Tuesday 22 November 2011

Blueberry and Lemon Gateaux


light and creamy
I've been busy for a week or so, so haven't got around to doing very much baking recently. I did make a tasty yet terrible looking unmarbled-marbled chocolate torte. It looked awful! I made this gateaux at my Monday night baking class. At first it didn't look as though it would turn out that well, but it ended up looking pretty good- and tasting yummy. It's a whisked/genoese sponge. It's iced with French butter cream (made with egg yolks and sugar syrup)- super light and creamy.
This will make a four layered gateaux filled with jam and blueberries, iced with lemon butter cream and finished with toasted almonds and dark chocolate. YUM!


Ingredients:
6 large eggs
185g caster sugar
185g plain flour
30g butter, melted and cooled


a small amount of plain sugar syrup for brushing


a punnet of blueberries
a few tablespoons of dark jam (I used blackberry)


3 large egg yolks
300g soft-ish unsalted butter
100ml water
150g sugar
zest of one lemon and the juice of half


flaked almonds, grated/shaved dark chocolate
Method:
-Heat the oven to 180/gas mark 4
- butter and flour 3 8 inch round tins and then line each with a circle of baking paper.
- boil some water in a pan and place a large heat proof bowl over the top without allowing the bowl to touch the water. Remove the bowl, add the eggs and sugar, then replace on to the pan of water and whisk on high. Continue to whisk until the mixture has doubled in size (around 10 mins). Remove from the heat and continue to whisk for 1 minute.
- sift the flour over the top of the mixture and gently fold in with a spatula or with a large whisk. Ad the melted butter and fold in
- distribute the mixture between the three tins and then smack them on the counter to get rid of big bubbles.  bake for around 25 mins- it should be lightly golden and should shrink away from the sides.
- once cooked, cool in the tins then slice each of the cake in half. You only really need 4 halves- there's an extra cake in
case one breaks, or if you want a massive gateaux. or another wee one.


- For the icing!
-put the yolks in to a bowl (a free standing mixer bowl if possible) and start to whisk them. 
-put the water and sugar in to a small pan and heat on low until the sugar has dissolved. Once dissolved, heat on high until the syrup reaches 110 C on a thermometer. Continue to whisk the yolks on high speed until creamy. Once the syrup has reached 116 C, remove from the heat and carefully pour in to the yolks, avoiding the whisk. Continue to whisk on high until cold
- once the bowl is cold, turn the speed to medium and then gradually add the butter until it's all in there. Mix in the zest and the juice. Tada! Super light, not overly sweet lemony butter icing.


- Brush some sugar syrup on the layers to moisten. Spread jam and blueberries in between the layers then cover the top and the sides with butter cream. Jazz it up with some piping round the edges, put some flaked almonds around the sides and pile some chocolate on top, or decorate it any which way you fancy.


Friday 11 November 2011

Spiced Gingery Snappy Biscuits

I've never been very good at biscuits
I've never been very good at making biscuits. I've only really ever attempted them a handful of times, but they always end up either too floppy, or you can taste the floury/doughy yuckiness of undercooked baked goods. Or they burn. or the recipe was plain just tasteless ('cinnamon treats' were not the treat they had promised). This one, however I think worked out pretty well! They were supposed to snap- and they do. Crunchy, tasty, spicy sweet biscuits that were simple to make. I adapted the recipe from the Marks and Spencer's christmas book 2009.

Ingredients:
225g plain flour
165g dark soft brown sugar
2 tsp ground ginger
1 tsp cinnamon
1/4 tsp ground allspice
1 clove, smashed pretty finely
150g butter, chopped
1 egg yolk

Method:
-  Put everything except the yolk in to a food processor and blitz until crumbly. Add the yolk and pulse until combined.
- tip out on to a clean surface and bring together until a solid dough is formed (mine was really dry so took a while- be persistent). Once fully combined, knead until smooth: not for too long. Wrap in cling film and refrigerate for 30 mins.
- Cut in half and place one half on a sheet of foil or baking paper. Place another sheet on top and roll to a thickness of about 3mm. Repeat with the other half, then put both in the fridge for another 30.
- heat the oven to gas 4/180C. Line 2 baking sheets. Cut out shapes from the dough (I got around 24 by using a 6 cm plain cutter, but you could also use a ginger bread man or any other shape). Bake for 11 minutes then leave to cool on the trays.


Salty Chocolate Truffle Torte

Deep and rich and rummy with salty peanut pastry
I was invited to dinner and scrabble at a friend's, so I said that I would bring round some dessert. I wanted to make use of my cute little loose bottom mini tart tins, and thought, salty pastry with rich chocolatey filling? YES PLEASE! I've made variations of this tart before, using almonds and cocoa in the pastry, bourbon in the filling, different amounts of salt, blah blah. This time I thought I'd make use of some pub quiz winnings rum and some ground up peanuts in the base. The result? rich, deep chocolatey smoothness with a warming heat from the rum and a salty crumbly finish.


Ingredients:
65g plain flour
15g icing sugar
40g butter
30g finely ground up roasted salted peanuts
1 egg yolk, lightly beaten (you will need nearly all of it)
pinch of salt


150ml double cream
15g golden syrup
25g dark soft brown sugar
175g dark chocolate (75% or so) broken in to small pieces
35g butter, chopped
30 ml dark rum


Method:
-Preheat the oven to gas 3/170, lightly grease 4 little tart tins with loose bottoms. Make the pastry. Put the flour, icing sugar and butter in to a bowl and rub in until it's breadcrumb like. Stir in the nuts and mix in some yolk to bind. Mix in a little iced water until it becomes a dough- not too much though. Wrap in cling film and freeze for 10 minutes or so.
-Roll out the pastry quite thinly and line the tins. Place a little foil or baking paper over the top and pour in some baking beans. Bake for 15 mins. Remove the baking beans and then bake for 10 mins more. Leave to cool.
- Heat the cream until it boils. Remove from the heat and add the sugar and syrup until dissolved. Add the chocolate and butter and stir until melted. Add the rum and stir. Leave it to cool for a little bit, then beat to emulsify. Pour in to the cases and leave to set.
- for extra heart attack inducing fun, sprinkle with a little extra sea salt before serving.


The pastry was a little thick, but that's not such a bad thing when you have all that filling to contend with

Friday 4 November 2011

Almond and Orange Blossom Friands

Three's a charm
I wanted to do some simple baking today, and of course craved something chewy and sticky that only a good measure of ground almonds can cater for- so I made a batch of friands. I don't have a proper tin, so I just used a plain old 12 hole muffin one and I think they turned out ok- perhaps a little singed, but that's because I have a gas oven (basically a box of fire) so that often happens to the back lot. 
The tins get greased with melted butter which helps to create a crisp and chewy crust, whilst the cake is light with a moist chewy texture from the almonds. Lovely with a cup of tea.
Ingredients:
180g unsalted butter, melted
6 medium egg whites
225g icing sugar
75g plain flour
125g ground almonds
zest of a lemon
1 tablespoon orange blossom water 
icing sugar to dust


Method:
-Set the oven to gas mark 6/ 200C and place a baking tray on the top shelf (large enough to put the muffin/friand tray on to)
-use a pastry brush to brush some of the melted butter in to each hole of a 12 hole muffin/friand tin and set the rest of the butter aside to cool.
- lightly hand whisk the egg whites in a large bowl until they are frothy. Not peaky, just frothy. Sift the icing sugar and flour over the top of the whites, the sprinkle over the almonds and zest. By sifting and sprinkling you should incorporate some air and not let any of the dry mix sink to the bottom of the whites. Gently pour over the melted butter.
- fold these in with the whisk by simultaneously turning the whisk and turning the bowl (or do it with a big metal spoon)until it's a smooth batter. Add the blossom water and mix. 
-Fill the holes nearly to the top. leaving a wee gap. Bake for 20 minutes, checking after 18. Leave to cool in the tins for a few minutes before running a knife around the edges and flipping them on to a rack to cool. Dust with icing sugar and enjoy!

hello, you


Monday 17 October 2011

Sticky Gingerbread with Pears

Sticky and Cakey
I finally remembered to get some treacle to make gingerbread. Hooray! I decided I wanted to make some gingerbread as I had a bag of pears that were ripening faster than I could eat them. My Grandma used to make a delicious trifle with Jamaican gingerbread, tinned pears, custard and cream. It was all store cupboard ingredients but it was delicious, and so the pear- gingerbread combination is one which will always remind me of her. Next time, I'll up the ginger, (it wasn't quite gingery enough- when I have something ginger flavoured, I like it to be really strong, and I will get around to brewing some ginger beer- crabbies was a disappointment), but in all honesty, it was delicious as it was. 
Ingredients:
8 oz plain flour
pinch of salt
1 tsp bicarbonate of soda
2 tablespoons ground ginger
1/2 tsp ground cinnamon
4 oz butter
4 oz golden syrup
4 oz black treacle
2 oz soft dark brown sugar
2 eggs, beaten
4 fl oz milk
1 oz mix candied & fresh ginger
2-3 ripe pears, peeled and sliced
Method:
- preheat the oven to gas mark 4 and line am 8 inch square tin with baking paper
- sift the dry ingredients in to a large bowl and set aside
-put the butter, syrup, treacle and sugar in a heatproof bowl of a pan of boiling water and leave to melt. Stir occasionally and when al combined and smooth, allow to cool slightly
- add the beaten eggs to the milk. Make a well in the centre of the dry ingredients and pour in the melted stuff followed by the milk and eggs. Beat with a wooden spoon until smooth. Arrange the sliced pears on top.
-pour in to the prepared tin and bake for around an hour.
-once a skewer comes out clean, leave to cool in the tin for 5 mins then on a wire rack until cold. Slice and enjoy with a cup of tea!


Friday 14 October 2011

Chocolate Raspberry Fortress Cake

It's basically just chocolate
It's a fortress because of its height: layers of cake, raspberries and chocolate ganache icing with an extra layer of fool for fun. It would have been two layers higher had it not been for the fact I had to transport it to my friend's for her birthday! The cake itself is a brownie-sponge cross. I used techniques and measurements from both types of bake to come up with a very chocolatey, rich sponge. A reason for this is that I'm usually a little disappointed with chocolate cakes as they never really deliver a chocolate hit, and I find that melting chocolate with butter usually does the trick. Coffee also makes it even more chocolatey!  I made the cake in 3 tins and sliced them open.


not the prettiest, but pretty tasty


Ingredients:
240g butter
200g 74/70% chocolate
1 tsp of instant coffee made up with 2tblsp hot water
1 tsp vanilla
200g caster sugar
4 eggs
40g soft dark brown sugar
240g self raising flour
1 tsp baking  powder
20g cocoa


icing:
150g raspberries 
300 ml double cream
200g icing sugar
150g dark chocolate


Method:
-preheat the oven to gas mark 5 and grease and line 3 8" round cake tins.
- bring a few inches of water to boil in a pan. Chop up the butter and chocolate and place in a heat proof bowl. Add in the coffee and vanilla. Once boiling, place the heat proof bowl over the top and turn off the heat.
- beat the eggs and the sugar together until light and doubled in size.
-sift together all the dry ingredients. 
- give the chocolate mixture a stir- if it hasn't melted, bring the water back to the boil, then turn off the heat. Once the mix has melted and cooled, slowly pour the chocolate in to the eggs and sugar whilst beating. Once thoroughly combined, sift the dry ingredients over the top and gently fold in using a large metal spoon. Do this until just combined. Pour equal quantities in to the tins, level out and bake for 20-25 mins, switching the tins around after 15 mins. 
-when baked, remove from the tins and leave to cool on a wire rack.


- melt the chocolate for the icing over a bowl of hot water. Add in the cream and mix together. Leave to cool. Sift in enough icing sugar to thicken so that it will hold the cakes together.


-slice the cake in half horizontally and spread some icing on the one of tops. Put some raspberries on and add another cake. Continue until you get to the last cake ( the recipe will make 6 layers, I only did four for the actual cake. It was lucky as one broke, so I had a spare. The other one is in the freezer for cake emergencies!). Spread the remaining icing on top and then decorate with some more raspberries.
I had some raspberry fool left over from this recipe so used it as one of the layers. Next time I make the cake I think that I would just make a load of fool and use it instead of the ganache, as the sharpness was excellent against the dense cake. 

Thursday 13 October 2011

Foolish Almond and Raspberry Cupcakes

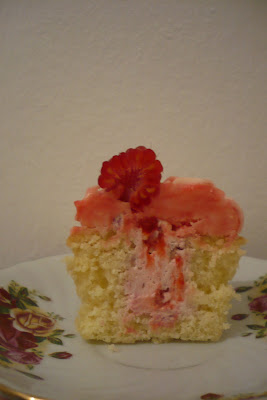
Almond and Raspberry Fool Cupcakes
I wanted to make a cake to take along to a friend's birthday and decided that wee cakes would be the easiest to transport. I wanted to do something a little more special than just a normal sponge with butter cream, and I also wanted to make it a little like a victoria sponge with jam and cream. So! I funnelled out a bit of the middle a filled it with a fool made with fresh raspberries and raspberry jam. TASTY! The sponge and icing are both almond flavoured because 1. that's one of my favourites and 2. almond and raspberry match well.
Ingredients:
3 eggs
6 oz butter
6 oz caster sugar
6 oz self raising flour
a few drops of almond extract


small pot of double cream
150g fresh raspberries
2 tblsp raspberry jam


125 g very soft butter
300 g icing sugar
dash of milk
red food colouring


Method:
-heat the oven to gas 4 and line a 12 hole muffin tin with papers
- place the butter in a microwaveable bowl and heat on the lowest setting for 10 second bursts. You want it to be as soft as whipped cream, but not melted. Add the sugar and cream together and beat until light and fluffy.
-add in the eggs one at a time, mixing well between each addition. Add in a few drops of almond extract.
- sift in the flour and mix until just incorporated. 
-  spoon in 3 tablespoons of mixture to each case. Bake for 20 minutes until a toothpick comes out clean.
- once baked, remove from the tin and leave to cool on wire racks.


To make the fool, lightly whip the cream and add in the jam and a handful of chopped raspberries. Mix gently.


To make the butter cream, beat the butter and add in half the icing sugar. Add in a few drops of extract, mix carefully, then add the rest of the sugar. Add enough milk to make it a bit smoother and lighter. Drop in a few drips of colouring and give it a few turns- if you mix it properly it will just be pink and not swirly.


- once cool, use a potato peeler with an apple corer to funnel out space for the fool from the cakes. Pipe in enough fool to fill (hard to say). Then pipe on the icing. Top with a raspberry. TADA!


Tuesday 4 October 2011

Salty Peanut Tiffin

Heart Attack in a convenient Bite Sized Mouthful
You know how there are some things in life that you can't comprehend? I don't understand how some people don't like eating savoury, salty snacks at the same time as a mouthful of chocolate. One of my favourite treats is a square of dairy milk sandwiched between a few ready salted crisps. NOM NOM NOM! So, having a craving for some salty chocolaty deliciousness, and considering you can't get pretzel flipz any more and I didn't have any walkers in the house I made some peanut refrigerator cake. There really is no need for a recipe for this, it's just what you have in the cupboard, melted together. Genius.
I melted a few bars of dark chocolate with a tablespoon of golden syrup and added around 10 broken rich tea biscuits, the remnants of a pack of coco pops, a handful of raisins and a big handful of salted roasted peanuts. Squashed it all in to a lined brownie tin and then poured on some melted milk chocolate. Stick it in the fridge and an hour later you have a slab of salty tea accompaniments to hand for as long as they remain uneaten! I always try to not add any 'fresh' ingredients like butter a it would limit the shelf life of the finished cake. 
Always there when you fancy a pick me up

Banana and Toffee Cupcakes

Bannoffi cakes
Banana sponge with toffee buttercream. YUM! To counteract the sweetness of the icing, I made some quite bitter caramel shards to decorate them. The sponge is a classic 3 egg Victoria with a few mashed up super ripe bananas. I would usually fill the cases up a little higher so that there is a better cake-icing ratio (I can't stand it when there is more icing than cake on a cup cake), but I fancied making a couple of chocolate banana mini loaves. I made my own toffee/caramel sauce for the icing in a very slapdash taste-it-and-see way. You could also use an actual recipe or the stuff that comes in a tin. I just had a few left over bits and pieces. This recipe makes 12.
Ingredients:
3 eggs. Weigh them in their shells and then use that weight for the self raising flour, butter and caster sugar.
2 very ripe bananas 
125g very soft butter
300g icing sugar
tsp milk
a few tablespoons of toffee sauce (I used a few tablespoons of sugar, a large knob of butter and a tablespoon of double cream boiled together and cooled)


Method:
- heat the oven to gas 4 and line a 12 hole muffin tin with cases
-cream together the butter and sugar
-add in two of the eggs. If it looks a little curdled, add in a little of the flour
-mash the bananas with a fork and mix in the 3rd egg. Add this to the mix and whisk.
- add the flour and mix to a smooth batter. Distribute evenly in the cases and bake for 20 minutes. 
Chocolate banana mini loaves
At this point I had a little batter left over and added 2 big tablespoons of cocoa powder and some chopped up chocolate and made these. Two wee loaves in my under used mini loaf tin.


When cooked, transfer to a wire rack to cool completely. 
To make the icing, beat the butter with half the icing sugar until well incorporated. Add in the rest of the sugar and the milk and beat well. Add the (cooled if just made) caramel and mix in. Decorate!


I made the shards of caramel by cooking some sugar with a dash of water in a frying pan until it turned a dark brown, then quickly tipped it on to some greaseproof paper until cold. I think it would have worked better if I smashed it up in to tiny crystals. NEXT TIME!
oodles of sugar

Apple Blackberry and Ginger Strudel

Super Seasonal Strudel
On Sunday we had a big roast, hooray! We wanted some dessert that wasn't too heavy but full of flavour. Having assessed that cox apples and brambles were in season, and an excellent match to boot, I made a strudel. I found a recipe for a pear and ginger one, so added a little of that spice in to the mix. I picked up the candied stuff whilst on holiday, so I'm not sure where to get it from here, so stem would be fine. Tasty! It takes minutes to throw together, and really delivers on taste. Perfect with a dollop of cream.
Ingredients:
750g cox apples
150g blackberries
50g granulated sugar
20g dark brown sugar
60g melted butter
20g candied ginger (or 40g of stem)
6 sheets of filo pastry
handful of flaked almonds
icing sugar to dust


Method:
- heat the oven to gas 6 and line a baking sheet with baking paper. 
- peel and core the apples and chop in to 1cm dice. Put half the butter in to a frying pan on a gentle heat. Tip in the apples and a the sugar and cook until they begin to soften. Transfer in to a bowl and cool for a few minutes. Add the ginger and the blackberries and stir gently.
- Place two sheets of filo on to the baking sheet and brush with a little of the butter. Spoon the filling down the long side. Fold the sides up and over the filling. Place another sheet on top and tuck under the sides. Repeat this, brushing with butter after each sheet. (Alternatively, place all sheets on the baking sheet, add the filling to one end, fold over the edges and roll).
- Brush with the last of the butter and sprinkle on the almonds.
-Bake for 20 minutes. Dust with the icing sugar and serve with some cream.

Wednesday 28 September 2011

Baked Chai Cheesecake

From the top.
This is the cake that my boyfriend requests the most. It's really simple, rich and creamy, yet light at the same time. It's baked, so it doesn't have a wobbly gelatine mousse like texture to it. The general recipe is always a winner so you could alter the flavours when the mood takes you- lemon, vanilla...I think that a sharp, zingy one would work well. I really like the chai flavours, sweetly spiced with hints of cinnamon, ginger and cardamom. I use a chai masala mix that I got in India, but you can use any kind-or if you have chai teabags, just stew a few in the milk for 20 minutes. The amount of eggs and cream cheese in the recipe means it's more of a New York style bake, which is why you get the slightly higher crust. It takes a while to cook- 4 hours in total, but most of this is just leaving the oven door open. It can be made 24 hours in advance, great for when you have a few friends over!


Ingredients:
375g digestives (or gingernuts)
175g melted butter
500g cream cheese
200g caster sugar
4 eggs
75ml milk
1 tablespoon masala tea
1 star anise
2 cardamom pods
1 cinnamon stick
1 tsp ground cinnamon
1 tsp ground ginger
1 clove
1 breakfast teabag
300ml double cream
2 tablespoons plain flour
1 1/2 tsp vanilla
zest of a lime and the juice of 1/2


Method:
- grease a 20cm spring form, high sided tin and heat the oven to gas mark 4
- blitz the biscuits in a food processor until fine. Add the melted butter and process for 15 seconds. Tip in to the tin and flatten. Make sure it's well packed or it will crumble apart later. Put in the fridge for an hour.
uber strong chai
- meanwhile, heat the milk in a small saucepan. Add the chai, the teabag and all the spices (not the vanilla or the lime). Bring to the boil then allow to stew while the base firms up. Strain and add to the cream.
- whisk together the cheese and the sugar. Add the eggs and the cream and whisk until well combined. Bash (with care) the bowl on to the side to remove any big bubbles.
- fold in the flour, vanilla, zest and juice. Pour in to the tin and bake for 1 hour. It should rise quite a bit and go brown on the surface. There should also be a slight wobble in the middle. If it's cracked, the oven may be too high. After the hour's up and it looks about done, turn off the oven and leave it in there fro 2 hours. Then open the door and leave it be for another hour. Goodness! THEN refrigerate overnight- or till it's cold if you want it now. 

it went down a treat!

Monday 26 September 2011

Lemon Courgette Cake

Lovely moist courgette lemon drizzle
A lovely, moist summery lemon drizzle courgette cake with zingy cream cheese icing. The courgette ensures the cake doesn't dry out and gives it a really good texture. I tried to make this last year and followed the recipe exactly- I was a little dubious about the method, and rightly so! It said to cream the butter with the sugar at the same time as adding the courgette and the lemon juice, which stopped it from blending together properly resulting in lumpy greasy bits of butter in the finished product. The cake tasted nice but it was greasy as. So this time I used the ingredients and made the cake as I saw fit. It went marvellously! (even though the oven was turned off by accident). Delicious. NOTE! If the butter for the icing can't be scooped and measured with a spoon, it is too cold and will not blend well. 


Ingredients:
250g very soft butter, 2 tsp scooped out and set aside
200g caster sugar
3 lemons
3 eggs
3 courgettes, grated (around 300g)
1tsp poppy seeds + more to decorate
1tsp vanilla
100g self raising flour + 100g wholemeal plain (or just SR)
1tsp baking powder
85g icing sugar
200g cream cheese 


Method:
Heat the oven to gas mark 4 and grease and line 2 20cm round tins
- zest and juice 2 of the lemons. Set aside
- cream together the butter (less the 2tsp) and sugar. 
-Add in the eggs and whisk together. If it starts to look a little curdled, add in a tablespoon of the flours. 
-Add in 2 tablespoons of juice, the vanilla, the seeds and the courgettes and mix well. Then add the flours and baking powder with 1/4 tsp salt.
- spoon in to the tins and bake for around 25 mins. They should be slightly browned and springy to the touch.
- cool for 15 mins in the tine then turn on to a wire rack.
- make a drizzle: mix 1 tablespoon of juice with 25g of the icing sugar. Poke holes in the cakes and drizzle over.
-make the icing: beat the 2tsp of butter with the cream cheese NOTE! they should be the same temp for them to blend together. Then add in the rest of the icing sugar. Add the zest of the 3rd lemon and 2 tablespoons of juice, or to taste.
- when cold, place one half of the cake on a plate, ice with half the icing, add the other cake and top with the rest of the icing. Add on some more poppy seeds.
ta da! nice with a cup of tea
Keeps well for a few days. Nom Nom.